|
|
 |
Exporting Data to Excel
Have you ever needed to export a Micro-Cap generated waveform or curve data to Excel? How is it
done? Well it's pretty easy, but there are a few steps to making it so. Here are the basic steps:
1) Setup the numeric output options to export the waveform or curve data.
2) Run the analysis.
3) Run Excel and use the Data / Get External Data / Import Text File option.
These are the basic steps, but there are details to be seen to. Here's an test circuit to work with:
|

|
This circuit simply creates a waveform for us to import into Excel. The first step requires that
we select transient analysis and then set up the numeric output using the Analysis Limits options:
This will print the V(1) waveform to the numeric output file. To simplify the transfer to
Excel a few more steps are helpful.
Press F10 to see the Transient Analysis Properties page and click on the Numeric Output tab. It
should look like the next figure.
On the left, we have selected 3 Digit Scientific format for both X and Y values because Excel
doesn't understand the default engineering notation. On the right, we have disabled all numeric output
normally printed and retained only the waveform values. Technically this is not necessary, but it
will make it easier to import to Excel if the only thing in the file is the tabular waveform data.
Press F2 to run the transient analysis. It should look like this:
|
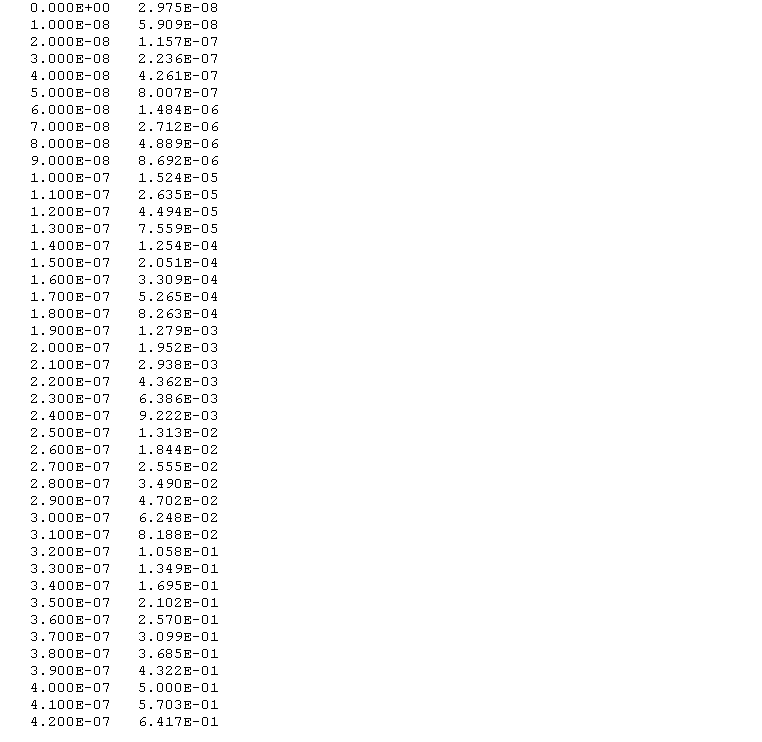
Now press F5 to see the numeric output text file. It's name is Export_Data_To_Excel.tno and it
looks like this:

|
Here we show only a portion of the 101 waveform values. The first column is time and the second
column is the V(1) values for the time. The usual text name headers have been removed by our
choice of options.
Now run Excel and select from the Data menu Get External Data / Import Text File. That will
bring up the File Open dialog box. Navigate to your data folder and open the file
Export_Data_To_Excel.tno
The screen should look like this:
This page lets you make certain choices about the data in the text file. Our Micro-Cap options have
created a delimited set of data so we want to select the Delimited option. Since we have deleted all
the other numeric output data we want to start the import at row 1. Click on the Next button and
you see page 2 of the Excel Import Wizard. It looks like this:
|

|
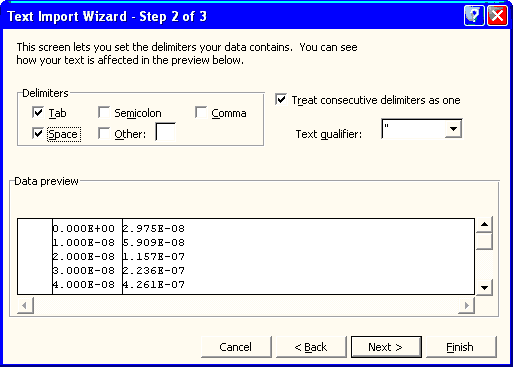
This screen lets you select the delimiter used to separate the numeric columns. Micro-Cap can use
any of several delimiters, including tab, semicolon, comma, space and other. The choice is made on
the Micro-Cap Transient Analysis Properties page / Header tab. In our case we've opted to use the
Micro-Cap default which is the space character, so we need to select the Space delimiter in the
Excel page. Click on the Next button and you see page 3 of the Excel Import Wizard. It looks
like this:
This page lets you tell Excel how to translate the data. Since the data is in standard
numeric format we need only click the Finish button.
The last page merely wants to confirm where to place the data. It looks like this:
|
The location is specified in Excel row and column notation and is the first cell to the
right of the last cell you clicked on.
Click on the OK button and Excel imports the data. In our case it looks like this next figure.
This shows what the Excel display should look like along with an Excel plot to show that
the plotted waveform matches original the Micro-Cap waveform.
|
|
|
|
|


