|
|
 |
Merging Components and Shapes into MC6
Micro-Cap 6 is the first generation of Micro-Cap simulators to let the user have access to multiple component and shape files simultaneously. This setup has obvious benefits. One of the main benefits is that the user can now place any of his own macros, subcircuits, or other new components into a file separate from the main Micro-Cap file. If Micro-Cap is upgraded or reinstalled, these files are not in danger of being overwritten. For a new user, simply open up a new Shape file in the Shape Editor and Component file in the Component Editor, and add the new parts into those files. For a user who is upgrading from MC4 or MC5, the procedure for merging the components from a previous version into a new file in MC6 is as follows.
The Shape Editor
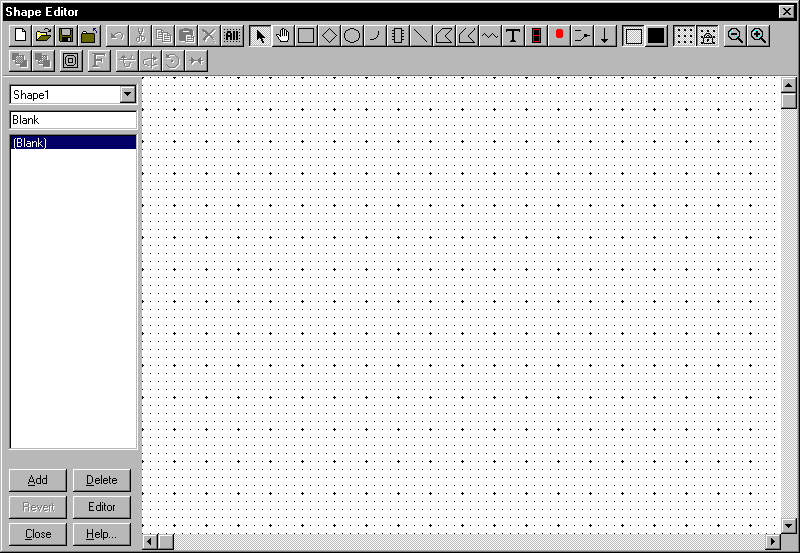
In the Shape Editor, the only thing to do is to set up a new file that the shapes can be copied into when a merge operation is performed. Perform the following steps:
1) Go to the Windows menu and choose Shape Editor.
2) In the Shape Editor, click on the New File icon, and a new file will be created with just a Blank shape.
3) Click on the Save File icon to rename the file. A .SHP extension must be used.
4) Make sure that the shape file that you want to merge into is the one currently selected from the list of files. This means that the Shape Editor is currently displaying the list of shapes from that file. The shape file selected when the Shape Editor is closed will be the shape file that any shapes that need to be merged will be sent to.
5) Close the Shape Editor and save it when prompted.
The actual merge operation is performed in the Component Editor.
|

|
Component Editor
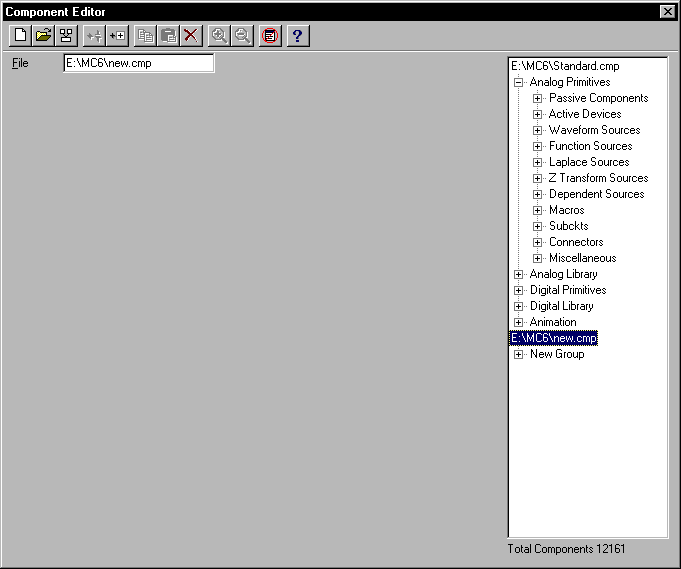
The Component Editor is the editor that has the merge capability within it. To merge from a previous version of Micro-Cap to a new file within MC6, perform the following steps.
1) Go to the Windows menu and choose Component Editor.
2) In the Component Editor, click on the New File icon, and a new file will be created that contains a single empty group.
3) Highlight the file name which will appear similar to 'C:\mc6\new.cmp'. The name of the component file can then be edited in the File text field at the top of the screen. The extension of the file must be .CMP.
4) Click on the Merge icon.
5) In the Open Component dialog box, select the file that is to be merged into the highlighted file. Any MC4, MC5, or MC6 component files may be merged. Select the appropriate type in the Files of type field. Once the file is selected, hit Open. This begins the process of merging. The merge operation will compare the file to be merged with the files in the Component Editor. Any component whose name does not currently exist in the Component Editor will be merged into the selected file. When the merge operation finds a component that does not exist in the currently loaded files, it will check to see if that component's shape exists in the Shape Editor files. If that shape does not exist, it will copy the shape over into the last selected shape file. If the file to be merged is from MC5 or MC6, the components will be placed in the new file in the same group as they existed in the old one. When merging to a new file, it is then possible to have groups of the same name in each of the files in the Component Editor. To edit a group name, simply highlight it and edit the name in the Group text field.
6) Close the Component Editor and save it when prompted.
|

|
The merge only brings over the component's schematic information. Any macro circuit or library would have to be copied over by the user. Remember that in the case of libraries, you may need to add the library name into the NOM.LIB file which resides in the DATA subdirectory of MC6. Open up the NOM.LIB file in Micro-Cap or in any text editor. On a new line, type in the following:
.lib "mylib.lib"
where mylib.lib represents the name of the library file. This statement also assumes that the library is in the same path as the NOM.LIB file. If the library is kept in a directory other than the one that the NOM.LIB is present in, a path would have to be added into the .lib reference, such as:
.lib "c:\project1\mylib.lib"
Once these procedures are finished, an MC4 or MC5 circuit that uses one of the user's components can be loaded and run in MC6.
|
|
|
|
|


