To transfer a file from the CMU to the PC or vice versa
1. Switch on and start up your R&S® CMU.
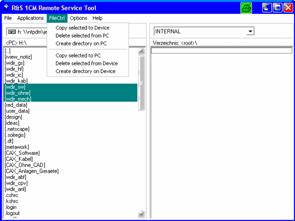
2. Select Applications File Transfer from the menu bar of the Remote Service Tool.
The main application window shows the directories and files on your PC and on the INTERNAL directory of the CMUs hard disk.
3. Select a directory, a file or several files and use the commands in the FileCtrl menu to initiate the file transfer. You can also right-click the file list to open the equivalent context menu.
Extracting screenshots
A screenshot transferred by means of the Remote Service Tool can be viewed and copied to the clipboard so that you can use it in another application.
To generate, transfer and further process a screenshot
1. Press the PRINT button on the front panel of the CMU to open the Print dialog, select Internal WMF as a destination and specify a file name <file>.wmf for the generated image file (without adding a path).
2. Press OK to write the file to the INTERNAL\USERDATA\PRINT directory of the CMU.
3. Proceed as described above to transfer the file <file>.wmf from the CMU to your PC.
4. Double-click the transferred file (alternative: select the file and press Enter).
The Remote Service Tool acts as a viewer for the file:
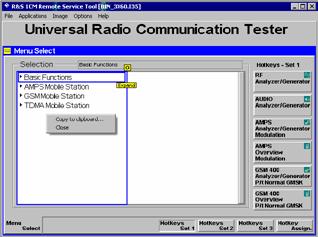
5. Right-click to open a context menu and either copy or close the file.